Julianna Carlson-van Kleef | 04/03/2024
Global Editing: Quickly fulfill websites with sitewide edits
This post covers: Applying Global Data and Design to content elements when designing website templates
As part of our blog series on template creation best practices, this blog post covers:
- The importance of synced sitewide data and design during template creation
- Set up your site templates with synced sitewide data and design
- Sync font styles in your template
- Applying your sitewide color palette to your website's content elements
- Applying sitewide design properties to shapes in Mono Editor
- Set up and sync images to central data hub for smart, easy fulfilment
- Bring it all together: Styling rows with shapes, images, and text boxes in Mono Editor
The importance of synced sitewide data and design during template creation.
Templates serve as the backbone for consistency and efficiency in website development. Yet, the true power of a website template does not solely lie in its structural framework, but in the strategic integration of synced data and sitewide editing functionality for increased productivity and adaptability.
The importance of sitewide editing functionality in templates is an often-overlooked aspect, but one that can significantly elevate the quality and efficiency of your templates. If you are an agency or digital reseller who builds hundreds – if not thousands – of websites, creating robust templates from the get-go can save you a lot of time in fulfilment.
Let’s say that you, as template designer, build a template with a website builder that supports synced sitewide data and sitewide design functionality.
In the template, you apply personalization tags throughout. Think personalization tokens you see in marketing emails - but across an entire website. For example, contact information on the contact page and in the footer, catchy taglines throughout the site, company description on the about page, and business-specific information in SEO fields.
This template can then be used as springboard for website creation. Not only do you, as a designer, save time by having a pre-created design and structural foundation – you save time when adding content to the site as well.
Once you have added your client’s company information to your website builder's central data hub, the areas where personalized data tags have been added to the template will automatically update with the relevant company information. This takes the grunt work out of manually scrolling through the site and copying in the right information – every time.

So, the more you enrich your templates with personalization tags and set a standard data collection process amongst your clients, the more efficient website building can be.
Now, you might be worried that your client’s websites would look too similar to one another by using a template over and over. Yet, that is where using a website builder with sitewide editing functionality comes in handy.
Change the look and feel of the website by updating fonts, color palettes, and content elements quickly by updating these properties centrally and have them applied sitewide. Then, with simple drag and drop of rows, columns, and content blocks, you can change the layout quickly – without having to build everything from scratch.
And do not forget how much images impact the look, feel, and branding of a website. Depending on your website builder, you can also set up smart ways to incorporate synced images to make website fulfilment easier.
With synced sitewide content and design functionality, you can transform a standard, universal template into a unique, branded digital presence for your customers.
So, how do you set up your website templates with synced sitewide data and design?
Set up your site templates with synced sitewide data and design
This, of course, is dependent on your website builder, as each will have different capabilities and functionalities.
For the rest of this post, we will guide you through how to set up sitewide data and design in our white-label website builder, Mono Editor.
Sync font styles in your template
When building a template, it is good practice to set up synced sitewide editing - if your website builder supports this. Why? Sitewide editing functionality reduces the need for tedious, manual updates.
For example, let’s say that you have a template that has a great foundation, but you want to update the fonts throughout the site. Not only do you want to update the font families used, but also the sizes, colors, and other parameters of your texts. This could be a very time-consuming process if you needed update each and every text box in your template.
With Mono Editor, you can set extensive properties for up to 29 global fonts, which is more than most other website builders on the market. Watch how to set up global texts in Mono Editor.
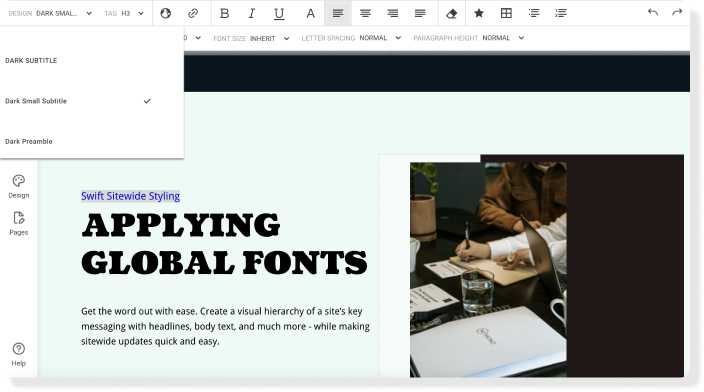
Once the global texts you wish to use have been set, then you can apply and sync these fonts to your text boxes. Simply:
- Add a text box
- Select the text
- Select the global font design from the Design dropdown in the Text Editor menu.
You can then also apply the HTML heading tag, or H-tag here. In Mono Editor, H tags are separate from the font design to provide you more flexibility in your designs.
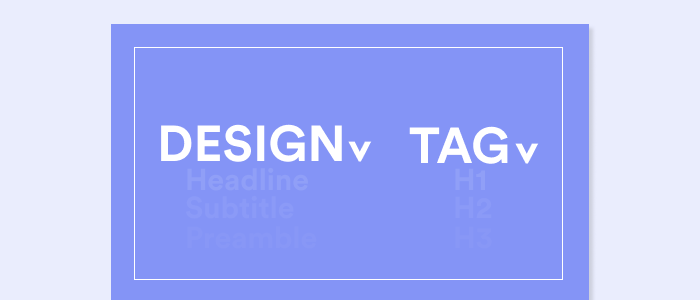
It is important to add an H-tag, as this helps search engines read and prioritize the text on your website. H1 defines the most important heading and H6 defines the least important heading on your page.
Want step-by-step instruction? Watch how to sync text boxes with global fonts and apply H-tags in Mono editor:
Once you have applied global fonts and H-tags to your text boxes and are happy with the overall styling of your text box(es) or rows – feel free to duplicate or copy and paste these content elements to speed up the process of formatting your website template.
Once you have an overview of your overall layout and where you want content to go, you can add global personalization tags to the text boxes for quick and efficient content addition and management.
Applying your sitewide color palette to your website’s content elements
It is the norm today that website builders support a sitewide color scheme, as consistency in design helps build trust with website visitors.
How easy it is to edit on a sitewide scale, however, is highly dependent on the website builder being used. In Mono Editor, you can set up to 15 global colors, which is more than most other website builders on the market. Watch how to set up your sitewide colors in Mono Editor.
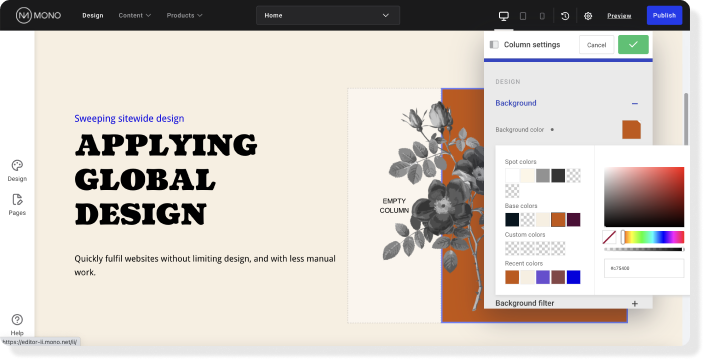
Once these colors have been set, they can be applied to fonts, buttons, columns, rows, and other content elements.
Let’s say we want to apply a background color to a row. In the row menu, we simply click the background color box to edit. While we could also apply a local, un-synced color here by adding a specific hex code, RGBA values, or selecting a color from the color spectrum, we choose to add a global color. To do so, we simply select a color from either our Spot, Base or Custom colors.
Watch how to apply global colors to columns and rows:
Then, if the global color applied to the row is updated later, then the row itself will be automatically updated. The process is pretty much the same if you apply a background color to a column – which leads us to creating shapes in Mono Editor.
Applying sitewide design properties to shapes in Mono Editor
How you can add or create shapes differs from website builder to website builder. In Mono Editor, there are a few different ways you can create or add shapes to your template design. You can use and modify icons already created in the editor, or you can also create unique shapes by stylizing columns and modules.
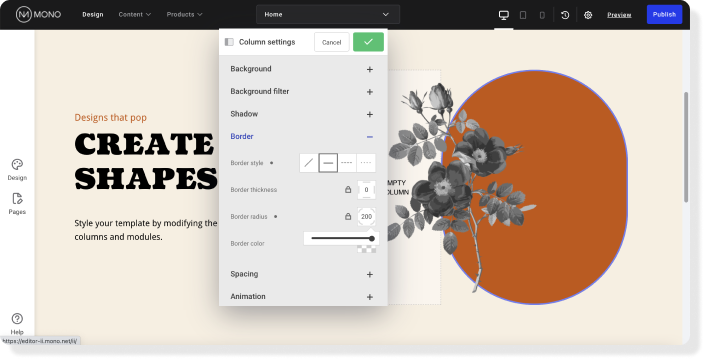
How do you create a shape from a column? Well, it starts with applying either a background or border color to a column in Mono Editor. With this simple step, you already have a rectangle. With a simple adjustment of the border radius, you have an oval or circle. A similar process applies when creating a shape from a module, or content block.
How you choose to create a shape, whether it is from a module or column, will determine how your shape can overlap other elements. See how you can create shapes and overlap elements in Mono Editor here:
The benefit of creating shapes this way is that you also have the control to edit the shapes on a sitewide scale. For example, you can sync your shapes to your sitewide color scheme, so when the color palette is updated, the shape colors update in turn.
Having a template that can easily be set up for quick customization to fit the needs of your many different customers is key to reducing fulfilment times, all without reducing quality and uniqueness.
And this brings us to one area that truly differentiates websites from one another: Images.
Set up and sync images to central data hub for smart, easy fulfilment.
As we discussed in Global Data: Quickly create content-rich templates, setting up your templates with global data not only makes it easy to manage an individual company’s content easy, but it can make fulfilment easier and shorten fulfilment time for every use of the template.
How so? Well, in your template design you have already determined where you want your images to go. By linking them to a central data hub, you don’t have to manually add in images every single time or find and update every instance. Instead, you can link the images to your central data hub – and update the images in one central location.
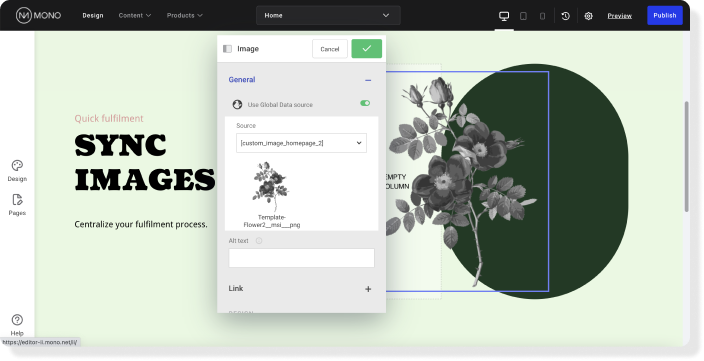
We have previously covered how to link, or sync, your images in global data, by simply adding your images to our central data hub, toggling “use Global Data source” in the relevant image module, and selecting the right image from the dropdown list.
But when designing templates to be used at scale, how images are named in the central data hub can also improve fulfilment processes. For example, your template might include images of flowers as your image placeholders – but as the images will most likely be updated, it does not make sense to name these images Flower 1, Flower 2, and so on. Instead, naming the images Homepage 1, Homepage 2, etc. is not only universal but indicates where on the website the images will be placed and in which order.
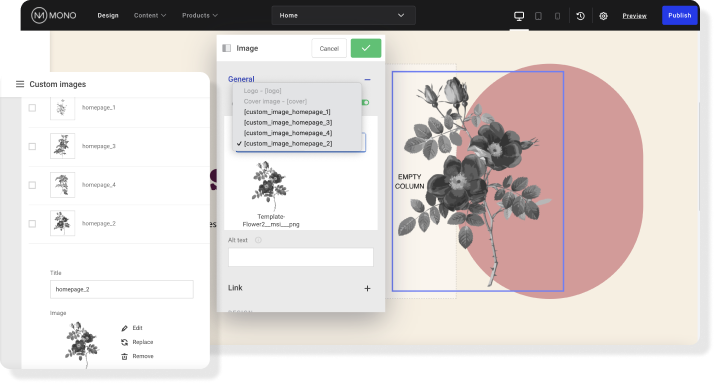
What’s more, the image module is linked to the relevant global image based on the name. If the name changes, the link is broken. So a standard, generic naming structure will make the process easier for repeated use of the template.
Then, when you, as the designer, are updating the template with the new company’s images, you can simply replace the image while keeping the same name and the new images will be automatically placed where they are intended to go.
Watch our example on how to name images in global data for easy template updates:
Now that we’ve covered the individual steps on how to set up your content-rich, easily customizable templates – let's see how these elements work together when designing content sections.
Bringing it all together: Styling rows with shapes, images, and text boxes in Mono Editor
A website is the sum of all of its parts. How well color palettes, design elements, fonts, text copy, images, etc. work together is vital to whether a website visitor has a favorable or negative first impression of the website – and in turn, business itself.
We’ve covered how to set these different elements up individually, but it is when they are taken in context of the whole site template that these elements truly make their impact. Watch our video on how you can style template rows with shapes, images and texts globally for easy website fulfilment:
The same also applies to sitewide editing properties. The effectiveness of global data and design may not appear great when applied to a single button, column, or row, in an example. Yet, this changes when applied to an entire landing page or multipage template.
Template creation takes time – whether you make use of global properties or not. But when templates are set up for synced, sitewide editing, you get a better return on your time investment.
Whether you are a seasoned developer, or a novice navigating better template creation processes, make use of comprehensive, well-designed templates and smart sitewide editing functionality to streamline website creation and upkeep.
Template creation for building websites at scale:
In this blog series, we have covered tips and tricks on how to improve building websites at scale by using smart sitewide editing functionality when building templates. So far, we have covered:
- 6 practical reasons why well-designed templates are essential for building websites at scale
- Global Design: Quickly create well-designed website templates
We have now looked at how to style and set up your initial template content for quick customization. In our next post, we will cover how you set up navigation and conversion elements in your template.
About Mono
Since 2007, Mono has been providing a premium, white-label website building platform to digital service providers to sell websites to small and medium-sized businesses (SMBs) at scale – and all at a competitive price.
The powerful Mono Platform has been built for digital service providers (our partners) to quickly create and manage SMB customer accounts; order domains, emails, and additional subscriptions; and fulfil websites swiftly and efficiently with extensive global data and design features.
With Mono, our partners have the technology and the solutions to build, manage and sell best-in-class websites at scale.
Not a Mono Partner? Request a demo here.